
How To Prep Wood For Paint After Sanding

How To Prep Furniture For Painting Video Chalk Paint Furniture Painted Furniture Diy Furniture

Diy Table To Ottoman And How To Paint Furniture Without Sanding Easy Peasy Pleasy Painting Wood Furniture Painted Furniture Redo Furniture

How To Sand Prep And Stain Wood Our Handcrafted Life Staining Wood Easy Woodworking Projects Sanding Wood

How To Strip Furniture With A Sander Get Your Furniture Prepped For Painting With Bella R Sanding Furniture Refinishing Furniture Diy Stripping Wood Furniture

How To Sand Prep And Stain Wood Our Handcrafted Life Staining Wood Woodworking Projects Diy Sanding Wood

A Foolproof Way To Avoid Tricky Sanding Salvaged Inspirations Painted Furniture Furniture Diy Refinishing Furniture
Ensure you rinse the rag between passes which also serves to remove all debris left behind from the sanding process.
How to prep wood for paint after sanding. When you water pop wood you wont have to do multiple coats of stain either. Work your way from the top to the bottom. This way you wont need sanding.
Before sanding scrape loose and flaking paint from the siding. The primer also keeps any stains on the wood from coming through the paint. Wipe the surface of the wood with a damp cloth to remove any remaining dust and debris.
After this second sanding the wood is ready for a stain or clear protective finish to be applied. Allow the primer to dry overnight for best results. Apply primer to the surface of the wood second coat if still translucent Prime the surface of the wood using a paintbrush or roller depending on the surface areas size and the number of details in the piece.
This will provide a smoother final finish. Pound-in any protruding nail heads. Always sand the same direction of the grain.
On certain woods such as oak and ash pre-wet the wood with a damp cloth to raise the grain before final sanding. The mineral spirits will clean any grime or grease off of your surface making it ready for painting or staining. There are only a few items required to prep wood trim for painting.
You can do away with these imperfections easily using a. You will need a hand brush to clean the dust. Dont sand all the way to bare wood just enough to remove any shine.

Pin On Furniture

How To Paint Over Varnish Polyurethane Seals And More Without Sanding Painting Over Stained Wood Painting Wood Paneling Staining Wood

Brace Yourself You Re About To Meet The Trending Product Of The Week That Will Elevate Diy Furniture Restoration Restore Wood Furniture Furniture Restoration

Yes You Can Use Chalk Paint Over Stain Chalk Paint Furniture Diy Painting Furniture Diy Chalk Paint Furniture
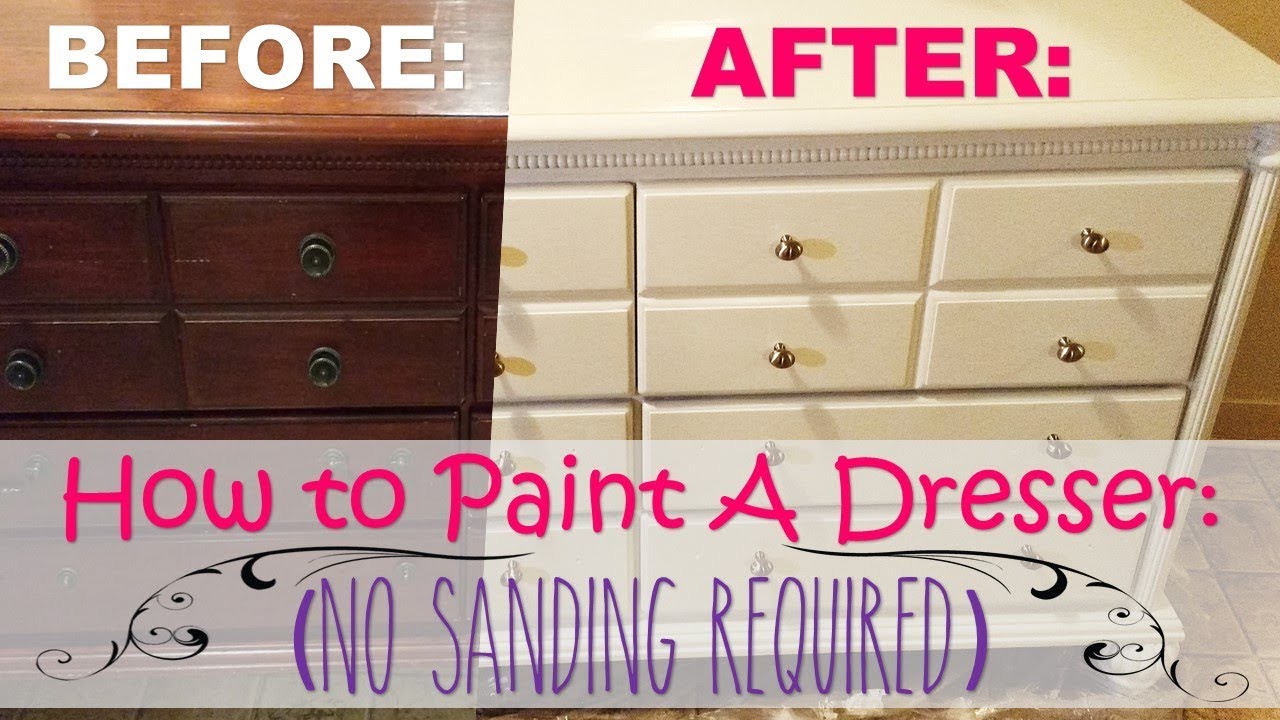
How To Repaint Furniture No Sanding Req Step By Step Instructions Youtube Repainting Furniture Painting Old Furniture Refinishing Furniture Diy

11 Secrets For Sanding Wood Projects Like A Pro Saws On Skates Sanding Wood Woodworking Tips Wood Crafting Tools

Sandpaper Cheat Sheet Delyla Design Blog Learn Woodworking Wood Diy Flipping Furniture

Easy Diy Furniture Painting And Refinishing No Sanding Or Prep Best Diy Chalk Paint Rec Diy Furniture Easy Painting Furniture Diy Wood Painting Furniture Diy

How To Update Old Wood Kitchen Cabinets No Sanding Or Painting Clean Kitchen Cabinets Diy Kitchen Renovation Update Kitchen Cabinets

Sanded Through Veneer Really Grrrrr Salvaged Inspirations Veneers Refinishing Furniture Recycled Furniture

Diy With My Guy Hall Wall Paneling Makeover Wood Paneling Makeover Wood Paneling

How To Paint Furniture Without Sanding Salvaged Inspirations Painting Old Furniture Recycled Furniture Salvaged Furniture

How To Sand Furniture Before Painting The Quick And Easy Way Video Video In 2021 Wood Furniture Diy Staining Wood Furniture Staining Furniture
