
How To Make Carved Candles
How Hand Carved Candles Are Made Youtube Candle Carving Hand Carved Candles Candles

Carved Candles Videos Red Black White Candles How To Make From Candles World Black Candl Velas Talladas Velas Decoradas Velas Artesanales

Bela Kandelo Hand Carved Candles Hand Carved Candles Candle Carving Candle Art

How To Make Carved Candles For Sale Candle Carving Candles For Sale Beautiful Candles
Make Your Own Candles Carved Candles Gift Idea For Her Gift Etsy Hand Carved Candles Candle Carving Pink Candles

Christmas Gift Ideas How To Make A Candle Carved Candle Purple Candle Decorative Candles Gift Ideas For Her Vanity Lighting Svechi Candle Carving Candles Crafts Purple Candles

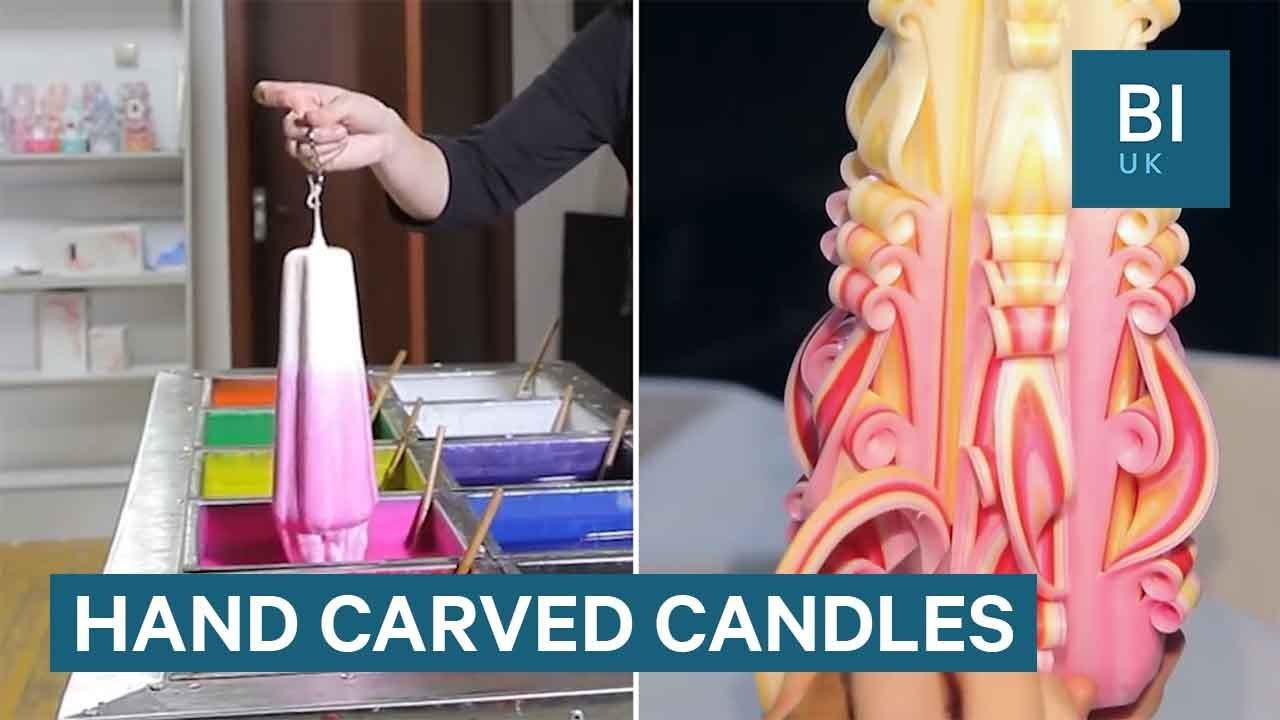
Once everything is assembled you have to fill the tube with water and fill the pails with wax.
How to make carved candles. However for carved candles. The wax of course comes clear so if you want colour or scent you have to add it. After the last dip-and-cool cycle trim the excess wax from the bottom of the candle.
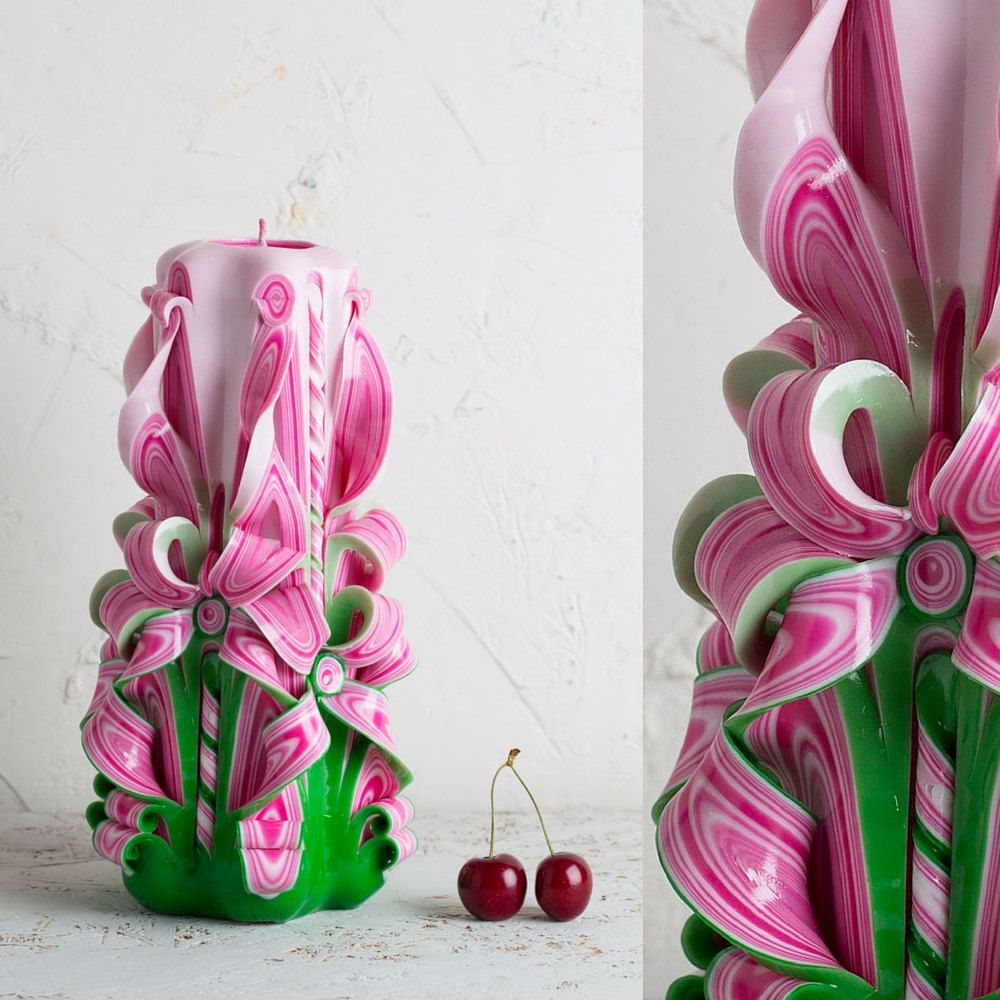
After adding layers and layers of colored wax its almost time to carve out the beautiful designs. Additionally the glaze will give your candle a nice glossy shine. After each staining dye dip in water harvesting for fixing colors.
Afterwards one of our Artisans cuts and carves it using spe. You may need a hammer to break them up to put them in the pails. Then the candle carver dips the candle into various waxes that have been colored with specially formulated dyes.
Twist and curl the carved leaves make different designs. Intricate twisted ribbons carved weaves and patterns. Alter the depth and angle to create different effects.
It is rather in the carving. The whole process begins with a six-pointed candle base. One Stop Candle has the ultimate idea for you in simple but very visually impressive candle carving designs.
So once the wax is melted at around 155 to 160 degrees you can add colour. The wax comes in sheets about two inches thick by 18 inches by 24 inches. The candle is an indispensable attribute to create a romantic atmosphere and a pleasant setting.

Carved Candles Purple Candles How To Make A Candle Home Etsy Candle Carving Purple Candles Hand Carved Candles
Handmade Carved Candles Candles Candle Carving Hand Carved Candles

Handmade Carved Candles Candles Fancy Candles Candle Carving

German Carved Wax Candle It Takes A Year Of Apprenticeship To Make Carvings Like This And The Entire Hand Made Piece Must Be Candle Carving Candles Candle Art

Handmade Carved Candles Candle Carving Homemade Natural Candles Candle Art

Christmas Is Closer Carved Candles By Fairy Candles Hand Carved Candles Fairy Candles Homemade Candles

Pin On Quick Saves

Unique Handmade Gift Candle Hand Carved Candles 5 Inch 12cm Ebay Candle Carving Hand Candle Candle Gift

Https Www Etsy Com Ru Listing 498865044 Carved Candles Ref Shop Home Active 14 5 Fancy Candles Candle Carving Cute Candles

Taper Candles Candle Set By Primacandle 17 Candle Carving Handmade Candles Hand Carved Candles

Candle Carving For Beginners An Easy To Follow Tutorial Candle Carving Candles Carving

Carved Candle Carved Candles Gift For Mom Peacock Tail Etsy Candle Carving Handmade Decorations Candle Modern

Pin On Gift Ideas For Mom
